
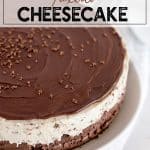

Need a show-stopper cheesecake that will have everyone in the room chanting your name and showering you with embarrassingly large amounts of praise? Do I ever have the dessert for that! Instant Pot Tuxedo Cheesecake with layers upon layers of chocolate. This is a serious winner!
I've talked about this before, but the funny thing with me and decadent desserts is that I can't exactly eat them (high levels of sugar make me quite ill), but cooking them for others is the most gratifying cooking experience ever.
No one swoons over dinner (even those “knocked-it-out-of-the-park” dinners) like they do over a perfectly executed dessert.
So I keep on creating these “to-die-for” cheesecakes because I know that, even though I'm not indulging in them, there are others squealing in delight over each and every bite.
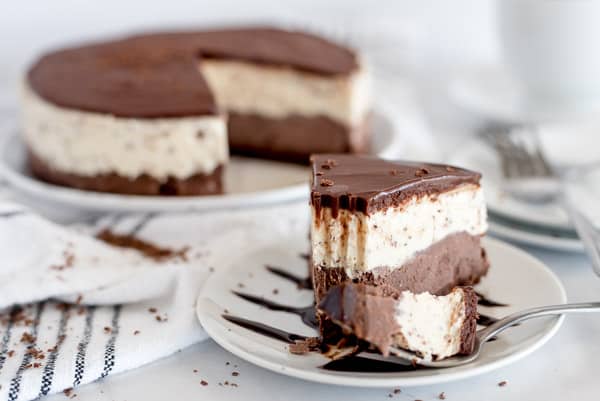
This brings us to today's four-layer Tuxedo Cheesecake, which I can give a 99.9% guarantee will sweep you completely off your feet with the first bite.
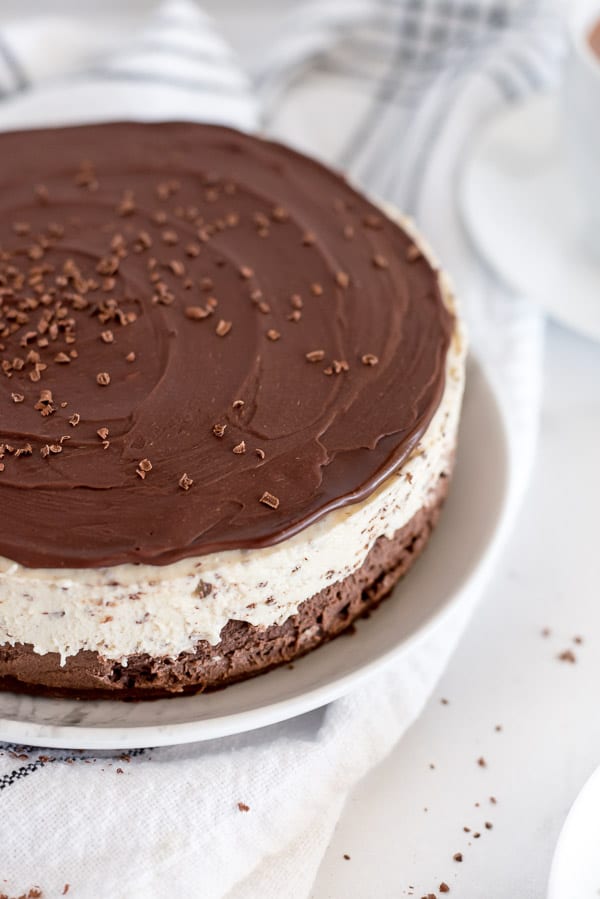
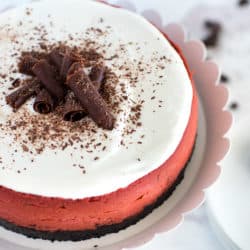
What is a “tuxedo” cake, you might be wondering? A tuxedo cake can be created several different ways, but gets its high praise name for consistently being a tall, impressive dessert, layered with chocolate and vanilla flavors, making it look like a tuxedo.
I wanted a full chocolate experience with this cake, so I went with white, milk, and dark chocolate all in one cake.
Each layer is unique in its flavor and texture, all while riding our favorite chocolate train that we never want to jump off of.
If you've been searching for an unforgettable dessert recipe for your next holiday party, THIS IS THE ONE!
WHY YOU WILL LOVE INSTANT POT TUXEDO CHEESECAKE
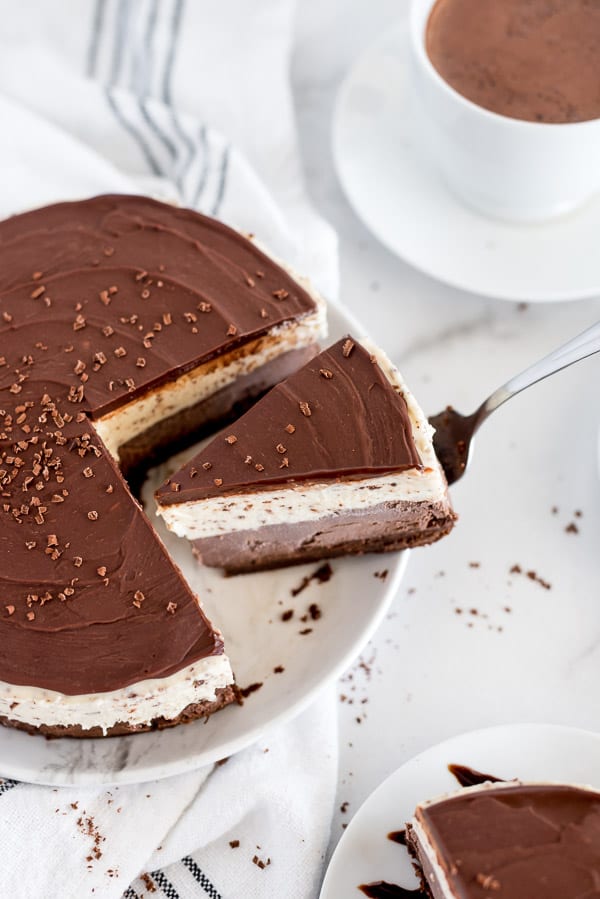
- THOSE HEAVENLY LAYERS: Let's start from the bottom: fudgy, chocolate brownie topped with a perfectly dense milk chocolate cheesecake. Next is a no-bake, silky white chocolate layer filled with grated chocolate to make it pretty, topped with an irresistible dark chocolate ganache . . . What more could you possibly ask for?! Could we add another layer with some whipped cream? Sure! Go ahead, you dessert master you.
- MAKEAHEADABLE: Yep, there are a few steps to making this cake, but it can be done up to 2 days in advance, so all you have to do on the day of serving is pull it out of the fridge and wait for your applause.
- UNIQUE: A tuxedo dessert isn't one you commonly see at a party, but it's one you will never forget once you've seen and tasted it.
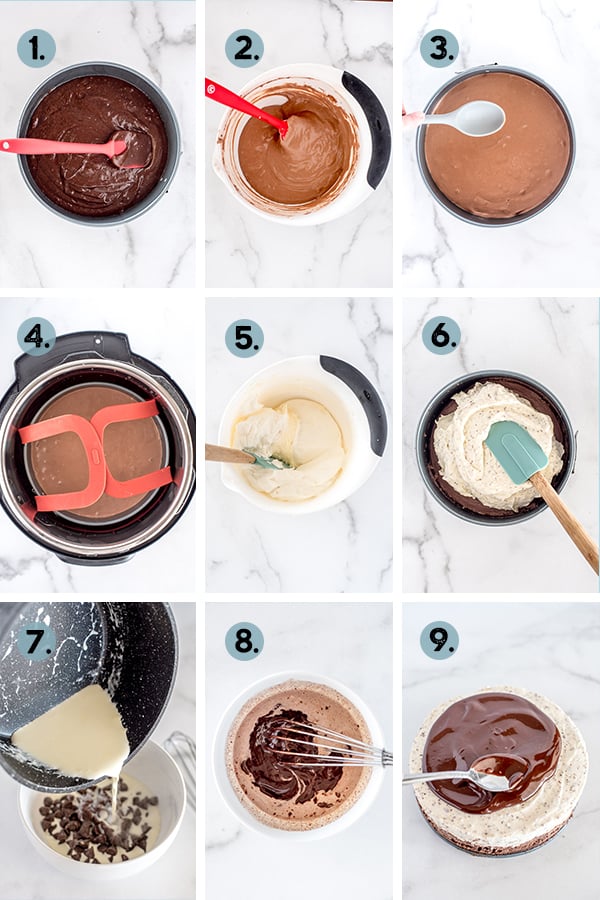
HOW TO MAKE TUXEDO CHEESECAKE IN THE PRESSURE COOKER
- Mix up the brownie base and press it into the pan
- Whip up the chocolate cheesecake layer
- Spread it over the brownie base
- Pressure cook then chill
- Whip up the no-bake, white chocolate layer
- Spread over the chilled chocolate layer
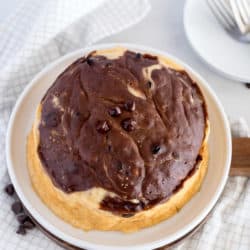
- Prepare the ganache by pouring hot cream over chopped chocolate or chocolate chips
- Whisk until smooth
- Spread over the white chocolate layer
SEE RECIPE CARD BELOW FOR DETAILED COOKING INSTRUCTIONS
TIPS FOR SUCCESS
- ROOM-TEMPERATURE INGREDIENTS: As with all cheesecakes, it's important to have the cream cheese and eggs at room temperature. This will ensure that the cheesecake is as smooth as possible without needing to overbeat it.
- STIR IN THE EGGS: Overbeating the eggs is the most common cause of a cheesecake that rises and falls. When it's time to stir in the eggs, do so gently with a spatula or spoon.
- PUDDING MIX: I went with Hershey's White Chocolate pudding mix so this layer would be a pretty white color. If you can't find it, a vanilla or cream cheese flavored pudding mix will also work well, but there will be a tiny cream tint to it.
- NO-BAKE LAYER TIPS: This layer gets very thick when you combine the cream cheese and pudding mix. It makes it a tad annoying to mix up, but it's necessary to achieve that thick, luscious no-bake layer. Once you stir the whipped cream into it, it will loosen up and be everything you're hoping for.
- GANACHE TIPS: For an ultra-silky ganache, you want to use quality chocolate. I like to either use a chopped-up bar of baking chocolate (like Bakers) or Ghiradelli chocolate chips. These 2 options have never disappointed me!
- SHAVED CHOCOLATE: For the chocolate shavings in the no-bake layer, use a cheese grater to grate any chocolate bar you like. You could also use mini chocolate chips (they look really cute), but I prefer the finer shavings.
- CHILLING IS IMPORTANT: There is a chilling time between each layer that, albeit annoying, is important for clean chocolate lines. This can be done over a couple of days if that makes things easier.
- TIPS FOR SERVING: Once the ganache layer sets up, it can be a bit tricky to cut through without squishing the no-bake layer. An easy fix is to run a knife under hot water, dry it off, then cut the slices. This will allow the knife to glide easily through the ganache.

HOW TO STORE AND FREEZE
- Store: Store the cheesecake covered in the fridge until about an hour before serving. I like to place it on the lid of a round bowl, then place the bowl over top. This is a great way to protect all those layers from getting bumped or smudged.
- Freeze: I've frozen slices of this cheesecake and can confirm it tastes amazing once thawed! First freeze it until solid, then wrap with plastic wrap and place inside a freezer-safe container. To eat, let it thaw overnight in the fridge.
MAKE AHEAD TIPS
Each layer can be prepared and refrigerated until you're ready to make the next layer. Just be sure to have the eggs and cream cheese at room temperature before preparing those layers.
I suggest serving within 2, maybe 3 days of making it.
VARIATIONS
- TOPPINGS: Whipped cream, berries, edible gold dust, flaky sea salt, etc.
- STRAWBERRY TUXEDO CHEESECAKE: With so many flavors of pudding mixes to choose from, you could easily change the flavors of the no-bake layer. I think strawberry would be delicious and stunning.
- CARAMEL TUXEDO CHEESECAKE: Swap the ganache layer for a caramel sauce — amazing!
I can't wait for you to taste this one! This is a dessert I wish I could mass-produce and deliver to each and every one of your doors.
The amount of joy it brings to a party is one of my most favorite things to witness. Make it and share a picture on Facebook or Instagram using #marcitidbits. I can't wait to see your cheesecakes and any spins you might add.
Enjoy!
MORE INSTANT POT CHEESECAKE RECIPES
- Hot Chocolate Cheesecake with Marshmallow Ganache
- Banana Cream Pie Cheesecake
- Pumpkin Cheesecake with Maple Glaze
- Caramel Apple Cheesecake
TOOLS/INGREDIENTS USED TO MAKE INSTANT POT TUXEDO CHEESECAKE
PrintInstant Pot Tuxedo Cheesecake
Decadent layers of chocolate, each as creamy and dreamy as the next, this Instant Pot Tuxedo Cheesecake needs to make a showing at your next party!
- Prep Time: 30 minutes
- Cook Time: 25 minutes
- Total Time: 6 hours
- Yield: 8 servings 1x
- Category: Dessert
- Method: Pressure Cooker
- Cuisine: American
Ingredients
For the crust
- 3 tablespoons butter, melted
- ½ cup sugar
- 1 teaspoon vanilla extract
- 1 egg
- ⅓ cup all-purpose flour
- 3 tablespoons unsweetened cocoa powder
- ¼ teaspoon baking powder
- ⅛ teaspoon salt
For the Chocolate Cheesecake
- 11 ounces cream cheese at room temperature
- ⅓ cup sugar
- ¼ cup 2% Greek yogurt
- 2 tablespoons cocoa powder (I use Hershey Dark)
- 1 teaspoon vanilla extract
- 2 eggs at room temperature
For the No-Bake White Chocolate Cheesecake Layer
- ¾ cup heavy cream
- ½ teaspoon vanilla extract
- 5 ounces cream cheese at room temperature
- 1 (3.4 ounce) box of instant white chocolate pudding mix (I use Hershey brand)
- ⅓ cup milk (any kind)
- 2 tablespoons shaved chocolate or mini chocolate chips (see notes about shaved)
For the Chocolate Ganache
- ⅓ cup heavy cream
- ½ cup semisweet chocolate chips (I use Ghirardelli)
Instructions
- Spray a 7-inch springform pan with nonstick cooking spray.
- For the crust: Whisk together melted butter, sugar, vanilla and egg. Add flour, cocoa powder, baking powder, and salt; stir to combine. Pour batter into the pan and smooth top. Place in the freezer to set while you make the cheesecake filling.
- For the Chocolate Cheesecake: Cream the cream cheese and sugar with a handheld mixer until very smooth, scrape the bowl and mix again.
- Add Greek yogurt, cocoa powder, and vanilla extract; mix until smooth, scraping the sides at least once to make sure everything is well incorporated.
- Add eggs and use hand mixer to barely combine, about 5 seconds, then use a spatula to gently finish mixing in the eggs — DO NOT OVERMIX IN THIS STAGE.
- Remove the pan from the freezer and fill with the cheesecake mixture.
- Add 1 1/2 cups of water to the pressure cooker pot and place trivet inside.
- Carefully lower the prepared pan onto the trivet. If you have the red OXO sling, use this instead.
- Secure the lid and turn pressure release knob to a sealed position. Cook at high pressure for 25 minutes.
- When pressure cooking is complete, turn the pressure cooker off. Let pressure release naturally — this will take 10-15 minutes.
- Remove pan from pressure cooker and place on a cooling rack. Use a paper towel to soak up any excess water from the top of the cake. Let it cool on a cooling rack for about an hour.
- Cover and place cheesecake in the refrigerator and chill for at least 4 hours.
- Once the cheesecake is chilled, prepare the No-Bake White Chocolate Cheesecake Layer: Pour whipping cream and vanilla extract into a medium-sized bowl and use a hand mixer to beat it until very thick.
- To another bowl add 5 ounces cream cheese, white chocolate pudding mix, and milk. Use the hand mixer (it’s okay if there is some cream left on the beaters) to mix it until smooth. It will be very thick, and that’s okay. If it’s too thick to beat, add a scoop or two of the whipped cream.
- Using a rubber spatula, gently stir the whipped cream into the white chocolate cream cheese mixture. Keep folding and stirring until it is thoroughly combined. This might take a minute to get incorporated completely, but it will. Fold in shaved chocolate.
- Spread the mixture on top of the cheesecake and smooth the top.
- Chill the cheesecake for at least an hour or overnight.
- For the Chocolate Ganache layer: Place chocolate chips in a bowl. Heat cream in a saucepan on the stovetop over medium heat just until bubbles start to form around the edges. Pour over the chocolate chips and cover for 2 minutes. Whisk until completely smooth and shiny. Let the ganache cool for about 10 minutes. You want the ganache thick enough that it will make a layer on top of the cheesecake without dripping over the sides. Pour the ganache on top and smooth to the edges. Refrigerate for at least an hour before serving.
- To serve: Gently remove the springform ring. Run a sharp knife under very hot water then dry it off. A hot knife will slice easily through the ganache layer so it won’t squish the no-bake layer.
Notes
- You will use a total of 2 (8 oz) packages of cream cheese between the 2 layers of cheesecake.
- Always use room temperature eggs and cream cheese when making cheesecake. This will ensure a smooth batter.
- Gently stir the eggs into the batter. Aggressive mixing will incorporate air into the batter which can result in the cheesecake overflowing as it cooks.
- For the pudding mix, I use Hershey's White Chocolate pudding mix because it is a white color instead of cream like the vanilla or cheesecake flavors.
- For an ultra-smooth ganache, use a baking chocolate like Bakers or a good quality chocolate chip brand like Ghiradelli (this is what I always use).
- For the shaved chocolate, use any chocolate bar and shave it with a cheese grater. Baking chocolate or a regular candy bar work great for this.
See this Instant Pot Caramel Apple Cheesecake for more tips and tricks for pressure cooker cheesecake.


I made this for a friend’s birthday and everyone raved about it- for days! I am baking it again for my chocolate-loving friend. It is a few steps but totally worth it! I can always count on your recipes to be delicious and turn out perfectly – thank you!
Stacy, this is a crowd favorite here too. I’m so glad you got to enjoy it!
I made this for a friend’s birthday and everyone loved it!
Stacy, I’m happy to hear that! It makes a fun statement for sure.
This was amazing! Everyone in the family absolutely loved it. I do think I will try the Oreo cookie crust next time, just for something different and easy. But it was perfect as is!
Teri, I’m so excited you tried it! I’m thinking to do a peppermint version for Christmas. Maybe make the crust out of mint Oreos . . . Thanks for the follow-up! I love to hear how the recipes go over with other families.
Can’t wait to try this one. We love all the cheesecakes we’ve tried so far. I had a question… under the make ahead tips you talk about cookie crumbs but I didn’t see them in the recipe. Did I miss them?
Pamela, I’m so gald you caught that! I’m so used to using cookie crumbs for the crust that I wrote that without thinking. I deleted it. This cake gets a brownie crust 🙂
This looks divine! I want to make it but my spring form pan measures 8″x2″ (inside measurement). Will that work or is it not tall enough? Thank you for all your wonderful recipes!
Trish, hmm…I actually think it will work great. Your layers won’t be quite as tall, but the height on your pan should be fine with it being a wider pan. Let me know if you try it!
Marci, do you not ever take just one little bite to taste something sweet? I would want to be sure it’s fine but also like a little taste at least.
Nancy, oh yes, I always take a bite or two. I don’t feel like I can write about it if I don’t know what it tastes like, haha! But I let the family and friends do the indulging 🙂
Oh my that looks wonderful! I’m going to add that to my collection of cheesecakes. I know a few in my family that would love all the chocolate layers. This one is so pretty too. You’re the best!
Smiles, Cecilia
PS
Made the pumpkin one for me and my twin sister’s birthday as we used to go to Olive Garden for pumpkin cheesecake on our birthday. This one is wayyyy better.
Cecilia, I can’t tell you how giddy it made me to hear you made the pumpkin one for your bday! I’m so excited it helped celebrate your day right 🙂
And yes, you must try the tuxedo version – you’ll die!