We all know and love pressure cooker Instant Pot hard boiled eggs for how easy they are to cook and peel. So let's take that one step further. I introduce to you: NO PEEL Hard Boiled Eggs!
You may be wondering, “Why do I need a no peel egg?” Give that thought about 10 seconds and as the possibilities set in you'll exclaim, “YES! Awesome idea!” No peel eggs are ready when you need them with zero effort for a salad, snack, etc. Also imagine how easy this is going to make egg and potato salads, YES!

I discovered this no peel hard boiled egg idea during some very strenuous testing for the Perfect Poached Egg. All those eggs that got over cooked? They became salad toppings and an egg salad.
And I thought, “this is too simple, and possibly will be very boring to my TIDBITS family here”.
Then I thought, “well, if I'm loving this kitchen hack, they probably will too!” So here ya go! Simple beyond belief and hardly needs a recipe, but I wrote one anyways.
Like I mentioned in the Poached Egg recipe, cook times may differ depending on which brand of these silicone trays you own. Mine is a bit thicker than some other ones I've tried and take a minute or 2 longer.

The eggs will pop out quite easily if you first scrape around them with a spoon or knife as shown in the video here. Then place them in a sealed container for up to 5 days. I've read suggestions online to cover them with a wet paper towel to keep the whites nice and soft.
I'm always on the hunt for kitchen tricks to make my life easier. If you've discovered any Instant Pot hacks of your own, please share! I devour this kind of info!
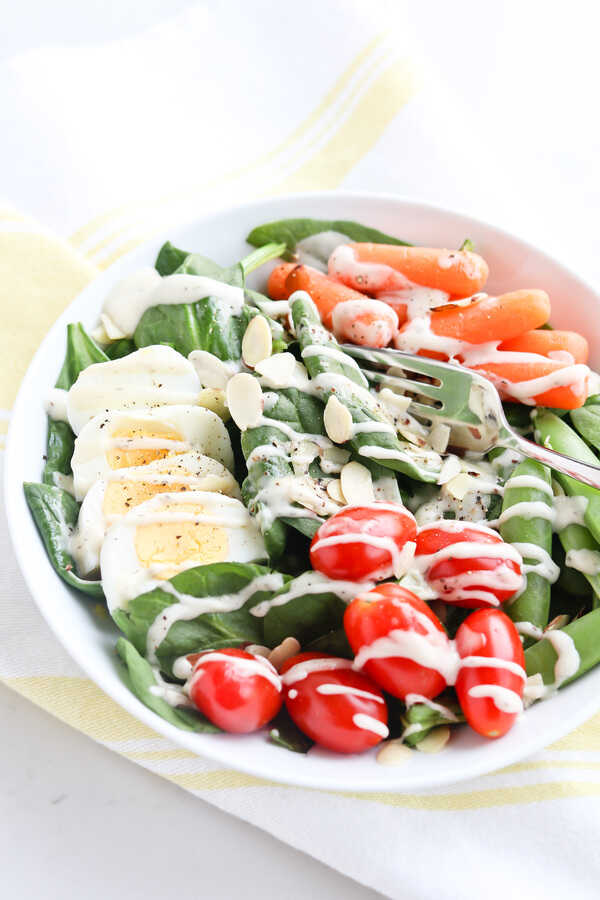
I should mention, that Ranch dressing on the salad above is from Sir Kensington's new Ranch line and I'm loving them! I loved the Classic flavor, but the Buffalo is my favorite so far. I've been putting it on everything. Mac and Cheese, baked potatoes, sandwiches, you name it. It's not overly spicy at all, but it is FLAVA-TOWN to the max.

Here's to simple recipes! Enjoy!
Tools used to make Instant Pot No Peel Hard Boiled Eggs
PrintInstant Pot No Peel Hard Boiled Egg
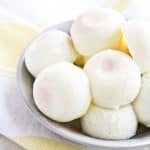
No peel hard boiled eggs ready to go whenever you need them. Such a great kitchen hack for busy lives!
- Prep Time: 2 minutes
- Cook Time: 14 minutes
- Total Time: 20 minutes
- Yield: 7 eggs
- Category: Side
- Method: Pressure Cooker
- Cuisine: American
Ingredients
- Eggs (anywhere from 1-7 eggs at a time, depending on how many your silicone tray holds)
- salt and pepper to taste
Instructions
- Add 1 cup of water to the pressure cooker pot and place short trivet inside. Spray silicone tray with nonstick cooking spray. Crack desired number of eggs into the holes of the silicone tray. Place tray on top of the trivet.
- Secure the lid and turn pressure release knob to a sealed position. Cook at high pressure for 13 – 15 minutes (see notes regarding cooking time).
- When cooking is complete, use a quick release.
- Check the eggs. The egg white should be completely cooked and the yellow center firm.
- Using a soft edge knife or spoon, carefully scrape around the egg to make sure it’s not adhering to the edges, then scoop it from the tray.
- Store in the refrigerator in a tightly sealed container with a wet paper towel to keep the egg whites soft for up to 5 days.
Notes
- Cooking time will vary depending on the brand of silicone tray you have. The brand I use is Popfex and it took 15 minutes. For another brand I have that is made of thinner material and more flimsy, they were done in 13 minutes.
- Number of eggs doesn't seem to matter here. I've cooked anywhere from 1-7 eggs at a time with consistent results.


I don’t see a video that you mentioned. My mold has a lid. Did you put a lid over the eggs? If so, seal it or just lay it on top?
Nancy, sorry about that! I’m checking on the video glitch. I’ve never put a lid on the eggs to cook them. If you do, I’m guessing you might need an extra minute or 2 of cook time.
Aloha Marci!
I do not own an egg bite mold but I’ve had a
regular sized silicone muffin pan that I never used. So I cut off two compartments leaving 4 that fit in my 8 qt DUO80.
Great idea for hard boiled eggs! I pressure cooked on high for 15 minutes and they are perfectly done. Thanks for sharing your tips!
Gale, Oh I Love your repurposing hack! It reminded me that I have some cube-shaped silicone containers. I think I’ll make myself some cube-shaped hard-boiled eggs just for fun :). I’m happy they worked out great for you!
Absolutely perfect! Game changer. Thank you for all the experimenting and then sharing!
Love the recipe. Bless you! Question: Could I use two egg molds at a time?
Deborrah, It’s a fun one, right?! Yep, 2 molds will work too.
Turned out perfectly! Wanted to add picture but didn’t see how to do so!
Mary, great little trick, right!?
Don’t know how I ended up here but I’m glad I did, going to try this recipe soon. I have an abundance of eggs and a planned salad for dinner thats begging for eggs as a topping, a win all around. Glad you shared and that I tripped over your share 🙂
Try storing whole hard boiled eggs in pickled beet juice. They will have a pretty pink color and look so nice sliced on a salad. They will keep better, too, in the sweet-tart vinegar.
Barbara, that flavor combo sounds right up my alley!
I’ve done that for years thanks to my MIL and it’s soooo good! Haven’t done it awhile so thanks for the reminder 🙂
We have tried this recipe with your recommended silicon baby food tray in a 8 qt and used 4 large eggs and pressure cooked for 7 minutes. Eggs were very hard boiled. We tried 4 minutes, still hard boiiled. We tried 1 minute and the eggs were very runny. Maybe 2 minutes would be better. Does time between end of cooking (beep) and quick release make a difference. What would be your recommendation for nice runny yolks but with white cooked. Thx
Leo
Leo, it takes some experimenting, the times can be so temperamental but once you figure out what works for your pot/altitude/tray etc, you’ll be good every time! I would try the 2 minutes.
I just put them in lil glass jars for work good for days. Sometimes I will slip a little bread and butter jalapeno juice, pickle juice or beet juice for added flavor or color in each jar ready for my lunches or travel snack.
Bryan, Yum, what a great idea and a perfect use for the leftover pickle juice!
Has anyone tried this using just egg whites? My daughter likes hard boiled eggs, but doesn’t eat the yolks.
Heather, I haven’t, but now that you mention it, I don’t know why I haven’t tried this. My kids love hardboiled eggs but won’t eat the yolk. I think it would work great and I’m going to do it and send it in their lunch boxes! They’re gonna be so thrilled!
OK, new at the Instant Pot game but I have the same silicone egg thingy as you. So, do you put the clear plastic top on the mold before cooking or leave it off?
Tee, If you have the same brand as me, it is made of plastic and you definitely wouldn’t want to put that in the pressure cooker. But so far, I haven’t covered anything that I’ve cooked in that mold.
You promised – you delivered. LOL. Thanks. Now I see there is no tipping or holding your tongue just right when removing the eggs from the mould. Thanks again for your expertise and lovely videos. Have a great day.
Sheila, yep, it’s pretty simple, they slip right out! I’m glad you caught it!
Another use for my silicone “egg cups”? I love it! I’m looking forward to trying both the poached eggs and these. Thank you Marci! 🙂
Carol, Might as well have as many uses for this accessory as possible, right!?
Hm, interesting! I’m pretty much blown away by this. What a time saver!
Cecilia, It really is! Not to mention the mess saver since my kids love to peel the eggs and then somehow scatter the shells all over the kitchen.
I love this! Might as well have all that poached egg research go to a good cause! I also like the paper towel idea and I am hoping it will keep those whites from getting all rubbery. That is one reason I don’t store boiled eggs too much–I don’t care for that texture
Karen, I read another tip that said to store them in water and change out the water every day. I don’t see myself remembering to do that so I’m testing the paper towel idea as we speak. I’ll let ya know how it works!
Yeah, I totally would forget that one too! I forget to cut up veggies and store them properly as well! Please do let me know how the paper towel works!
Karen, I had the eggs on a spinach salad tonight and they were perfect! They were on day 3 of being in the fridge with the paper towel on them.